이번 포스팅에서는 ggplot2 패키지를 활용해서 다양한 Scatter plot을 그려보도록 하겠습니다.
1. 실습 데이터 정의
# Convert cyl column from a numeric to a factor variable
mtcars$cyl <- as.factor(mtcars$cyl)
head(mtcars)

<< Result >>
                   mpg cyl disp  hp drat    wt  qsec vs am gear carb
Mazda RX4         21.0   6  160 110 3.90 2.620 16.46  0  1    4    4
Mazda RX4 Wag     21.0   6  160 110 3.90 2.875 17.02  0  1    4    4
Datsun 710        22.8   4  108  93 3.85 2.320 18.61  1  1    4    1
Hornet 4 Drive    21.4   6  258 110 3.08 3.215 19.44  1  0    3    1
Hornet Sportabout 18.7   8  360 175 3.15 3.440 17.02  0  0    3    2
Valiant           18.1   6  225 105 2.76 3.460 20.22  1  0    3    1
이번에 사용할 데이터는 R에 내장되어 있는 mtcars 데이터입니다.
분석을 위해서 cyl 변수를 factor 형으로 바꾸겠습니다. (4, 6, 8)
2. 패키지 불러오기
library(ggplot2)library 함수를 통해 먼저 ggplot2 패키지를 불러왔습니다.
3. Scatter plot 꾸미기
# Basic scatter plot
ggplot(mtcars, aes(x=wt, y=mpg)) + geom_point()
가장 기본적인 Scatter plot입니다. geom_point 함수를 통해 그릴 수 있습니다.
(1) Point size and type
# Change the point size, and shape
ggplot(mtcars, aes(x=wt, y=mpg)) +
  geom_point(size=2, shape=23)
geom_point 함수안에 size와 shape를 변경해주면, 점의 크기와 모양을 변경할 수 있습니다.
# Change the point size
ggplot(mtcars, aes(x=wt, y=mpg)) +
  geom_point(aes(size=qsec), shape = 7)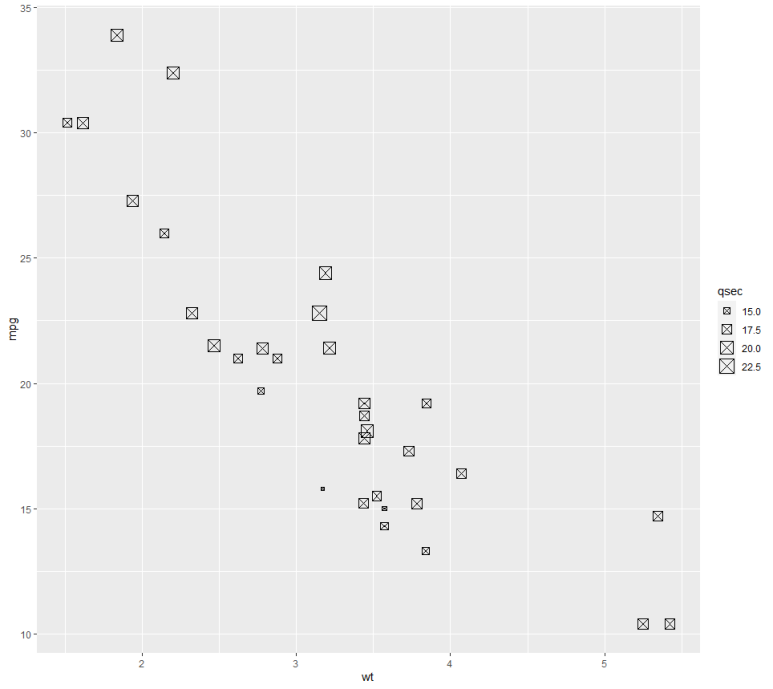
모든 동일한 사이즈가 아니고, 값의 크기에 따라 사이즈를 변경해줄 수도 있습니다.
(2) Labeling
### Labeling
ggplot(mtcars, aes(x=wt, y=mpg)) +
  geom_point() +
  geom_text(label=rownames(mtcars))
다른 그래프와 마찬가지로 geom_text 함수를 통해 Point에 Labeling을 진행할 수 있습니다.
(3) Regression Line
# Add regression line
geom_smooth(method="auto", se=TRUE, fullrange=FALSE, level=0.95)
Regression line은 geom_smooth 함수를 통해 그릴 수 있습니다.
se인자를 True를 추가하면 신뢰 구간이 추가로 그려지게 됩니다.
level은 신뢰구간의 신뢰도입니다.
# Add the regression line
ggplot(mtcars, aes(x=wt, y=mpg)) +
  geom_point()+
  geom_smooth(method=lm)
# Remove the confidence interval
ggplot(mtcars, aes(x=wt, y=mpg)) +
  geom_point()+
  geom_smooth(method=lm, se=FALSE)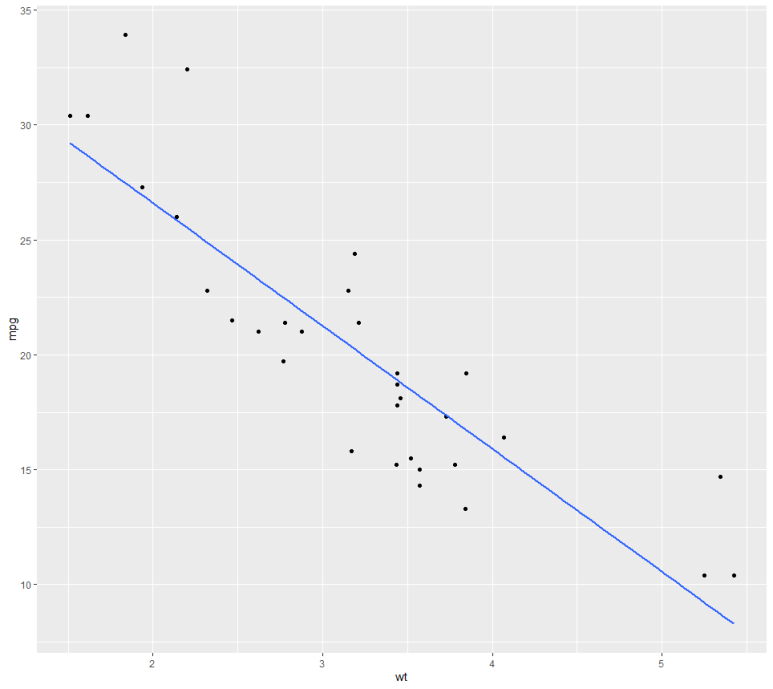
# Loess method
ggplot(mtcars, aes(x=wt, y=mpg)) +
  geom_point()+
  geom_smooth()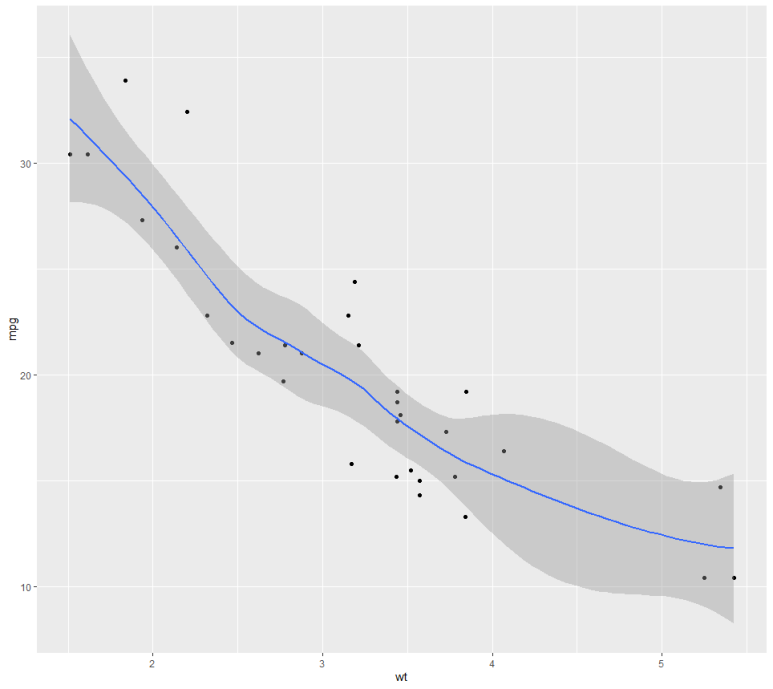
(4) Regression type and color change
# Change the confidence interval fill color
ggplot(mtcars, aes(x=wt, y=mpg)) +
  geom_point(shape=18, color="blue")+
  geom_smooth(method=lm,  linetype="dashed",
              color="darkred", fill="blue")
Regression line을 점선으로 바꾸고, 신뢰구간을 blue로 채색하였습니다.
(5) Point color with group
# Change point shapes, colors and sizes
ggplot(mtcars, aes(x=wt, y=mpg, shape=cyl, color=cyl, size=cyl)) +
  geom_point()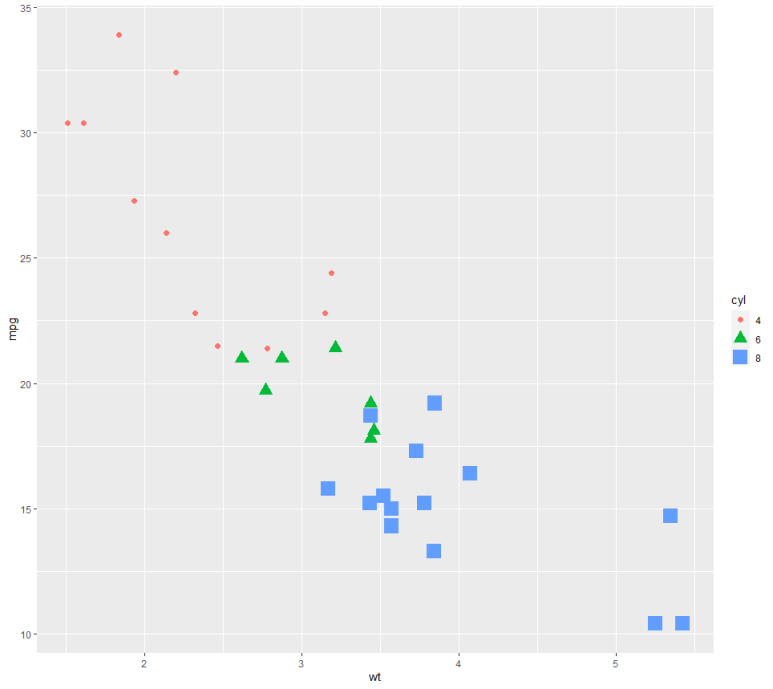
shape, color, size에 factor인자를 넣으면, group별로 다른 point가 찍힙니다.
p <- ggplot(mtcars, aes(x=wt, y=mpg, color=cyl, shape=cyl)) +
  geom_point() +
  geom_smooth(method=lm, se=FALSE, fullrange=TRUE)+
  theme_classic()
p
# Use brewer color palettes
p+scale_color_brewer(palette="Dark2")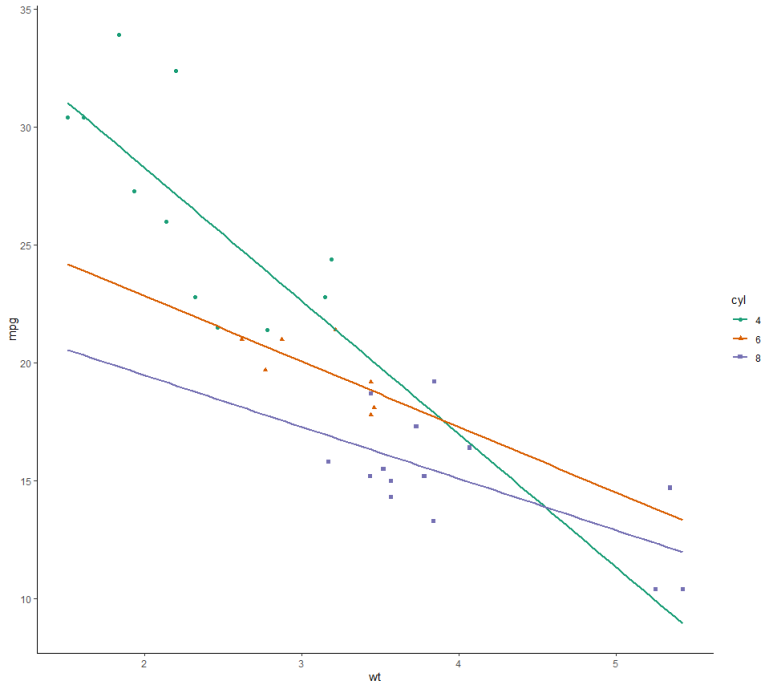
'데이터 다루기 > 데이터 시각화' 카테고리의 다른 글
| [R을 활용한 시각화] 5. ggplot2 (Area plot) (0) | 2020.12.04 |
|---|---|
| [R을 활용한 시각화] 4. ggplot2 (Box plot) (0) | 2020.11.30 |
| [R을 활용한 시각화] 2. ggplot2 (Lineplot) (0) | 2020.11.25 |
| [R을 활용한 시각화] 1. ggplot2 (Barplot) (2) (0) | 2020.11.25 |
| [R을 활용한 시각화] 1. ggplot2 (Barplot) (1) (0) | 2020.11.23 |


